
Every software engineering job posting out there requires a mandatory skill of knowing some kind of version control system.
I know that you are a great developer. You can build highly scalable systems, amazing apps and websites. But you can’t do everything alone. To build something great, you have to be a part of a team.
But why is it mandatory to be familiar with a version control system?
Version control system helps a software team manage source code changes made over time. When you have multiple developers working on a single application, version control helps in various ways.
- Tracking changes made by an individual developer
- Preventing concurrent work from conflicting
- Easily share source code with new developers
- Restoring previous versions
There are many version control systems like Git, CVS, SVN, Monotone. At SpaceUpTech, we use Git as it is popular and open source.
Let’s Start With Git
Learning git can be complicated for beginners as the tool offers a wide range of functionalities. And you don’t want to get stuck in a tutorial trap for several days trying to figure out what is git and how to use it?
What you should be looking for are the essential git functionalities that a company uses daily to develop different applications, project, products etc.
You might just have to learn five commands out of 100 to get started.
In this blog post, we will be seeing how SpaceUpTech uses git internally to release different versions of the Space Cloud - An open-source Firebase + Heroku Alternative.
When you join a software company, you’ll get assigned to a project. The company will be using a cloud-based service like Github or Gitlab to host source code of your project.
Why store in the cloud?
Don’t you think it would be much easier to get source code files from an internet URL rather than asking your teammate for source code?
To be precise, the location where the source code is stored in the cloud is called a Git repository. Let’s call this Git repository where you always get the latest code changes from as Upstream.
Great, now you know where all source code is kept. But you can’t start writing code right away.
You have to do some initial git setup locally and remotely with every new project you will be working on.
Setting things up
1] Forking Upstream Repository
What is forking?
In Github, forking a repository creates a copy of that repository in your GitHub account. Forking a repository allows you to freely experiment with changes without affecting the original project.
Think of this use case, where you want to create a billing software, but instead of creating it from scratch, you fork an existing open-source repository and start building on it. This saves you a lot of time.
Note: Forking only copies the current state of the repo, further changes done in the forked repository doesn’t get automatically updated in your copy. You have to do it manually.
Why are we forking?
In an organization, as a new developer, you will only have read access to the upstream repository. The project manager or Sr. software developers will have the write access.
In other words, you can’t make changes to the upstream repo directly.
You’ll have to make your copy by forking the upstream repo and make changes to that.
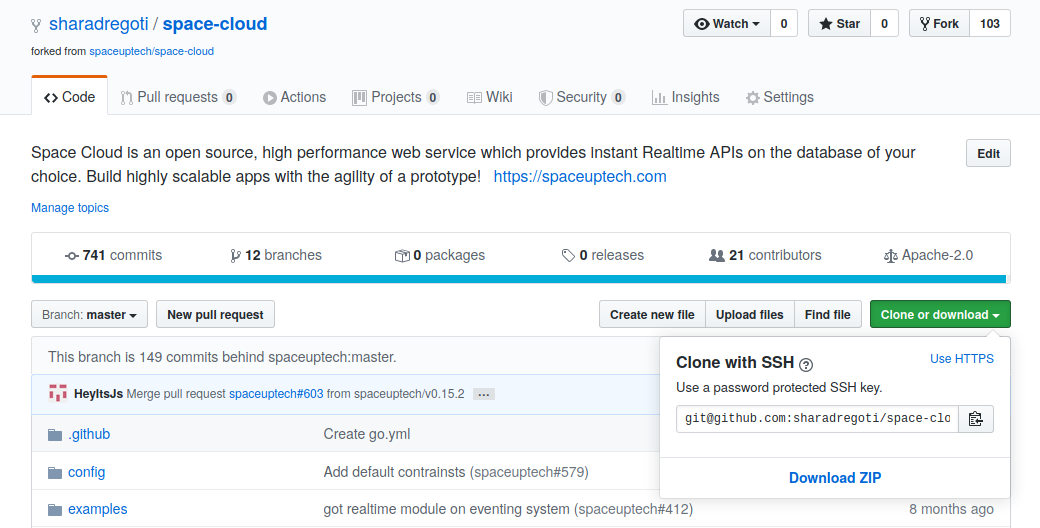
How to fork?
- Log in to your GitHub account.
- Head over to the upstream repo.
- Click the fork button on the top right corner as shown in the image.
Currently, if you do not belong to any organization you can for this repo to follow along Space Cloud.

Wonderful, now you have a copy of upstream repository which contains the latest project code in your account. Let’s call this repository as Origin.
2] Setting SSH Keys (Optional)
What are SSH keys, why should you use them and how to set up SSH keys in GitHub is nicely explained in this article.
Perfect, we are done with the setup in the cloud. Let’s move on to the local setup.
3] Cloning Origin Repository
What is cloning?
Cloning a GitHub repository creates a local copy of the repo in your laptop or pc.
Why are we cloning?
This allows you to make all of your edits locally in your machine, use the feature offered by the IDE. Install external dependencies if any.
How to clone?
- Log in to your GitHub account.
- Go to your origin repository.
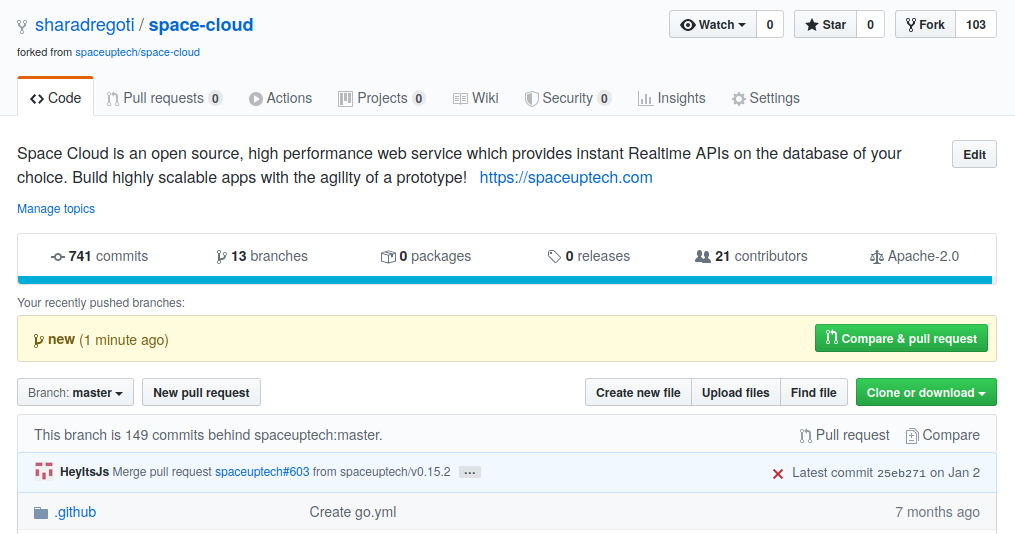
- Click the green colour Clone or download button.
- Make sure the link starts from git keyword. If it starts from HTTP, click on use SSH. Then copy the entire link.
Make sure git is installed on your machine before executing the command.
Go to your terminal or bash and execute your first git command git clone <paste-copied-url-here>.
4] Setting Up Remotes
What is a remote?
A remote in Git is a common repository that all team members use to exchange their changes.
How to add a remote?
By default when you clone some remote repository (we have already cloned our origin repository). It creates a remote called origin. To checkout the default remote use command
git remote -v
Forking only copies the current state of the upstream repo to origin repo, the changes made by your team to upstream after forking are not available.
To get the latest changes locally, you have to add the upstream repository as a remote locally.
For adding a new remote, you will need URL of the remote. Head over to your upstream repo and use the same process to copy the URL.
git add remote upstream <paste-copied-url-here>
Great, we have completed our initial setup. Now we can start coding.
Using Git
Let’s say you have been assigned with a task to create a new endpoint in the backend, which takes 2 numbers in request and sends the summation in response. This feature is to be released in version 18.
I know you can code the task in 5 minutes, but before starting with any task that you might get assigned in future, you have to ensure that you are writing code on the correct git branch.
But what the heck is a branch?
A Git branch is essentially an independent line of development. You can take advantage of branching when working on new features or bug fixes because it isolates your work from that of other team members. A git branch is an independent line of development taken from the same source code.
For example, we released a product for 6.0 version and we might want to create a branch so that the development of 7.0 features can be kept separate from 6.0 bug fixes.
There will be 2 main branches in the upstream repository
- Master: Source code containing in master branch always reflects a production-ready state
- Develop or Version: Source code always reflects a state of latest development changes for the next release
Note: By no means are these branches “special” from a technical perspective. The branch types are categorized by how we use them. They are, of course, plain old Git branches.
When you clone a repository, you only have the master branch by default. You can check it out using
git branch -a
To get the latest version branch which doesn’t exist locally, use command
git fetch < remote-name > < branch-name >
Steps For Ensuring You Are Writing Code On The Correct Branch
1] Getting Version Branch
By default, after cloning, you will only have a master branch locally. To get the version branch where all the new features are developed by your team. Use command
git fetch upstream
2] Switching To Latest Version Branch
Now that you have the latest version branch locally. You just have to switch to the version branch. Use command
git checkout <verion-branch-name>
3] Ensure You Have Latest Code In Version Branch
Finally, ensure that you have the latest changes by running the command.
git pull upstream <branch-name>
4] Creating Feature Branch
Now create a new feature branch from the version branch.
What is a feature branch?
Feature branches are used to develop new features for the upcoming or a distant future release. Feature branches should always be created from a version branch. Once the code in the feature branch is accepted, it gets merged in the develop branch(to add it into the new release.
How to create a feature branch?
git checkout -b <feature-branch-name-here>.
Finally, after the creation of a feature branch, you can start writing some code which will be added to the latest version.
After completing your code and testing it well, you have to push your code to origin repository. Remember you are pushing your code to the origin as you cannot push code directly to the upstream repository.
Steps For Pushing Code To Upstream
1] Add Files To Staging Area and Commit Your Code
What is a staging area?
The working area is the place where files that are not handled by git. These files are also referred to as “untracked files.” The staging area is files that are going to be a part of the next commit. These files are also referred to as “tracked files”. The “commit” command is used to save the tracked changes to the local repository.
Use command this command to stage all files at once
git add --all
Use this command to stage individual files
git add <file1.txt> <file2.txt>
Don’t forget to commit your code.
git commit -m "your commit message"
2] Push Your Code To Origin Repository
When you add a commit in your local repository the tracked file gets saved locally, only these saved file will be pushed to the origin.
git push origin <feature-branch-name>
3] Creating Pull Request
So how will my code reach the upstream? We create a pull request!
What is a pull request?
A pull request is a method of submitting contributions to an open development project. A pull request occurs when a developer asks for changes committed to an external repository(origin in our case) to be considered for inclusion in a project’s main repository(upstream in our case).
How to create a pull request?
Make sure you are logged in to GitHub. After pushing your code to the origin repository, you will see an option saying create a pull request on GitHub as shown in the image below. Click on “Compare and pull request” button.
Make sure you are creating a pull request on the correct branch of upstream. Choose from the different version branches available and Click “Create pull request” button.
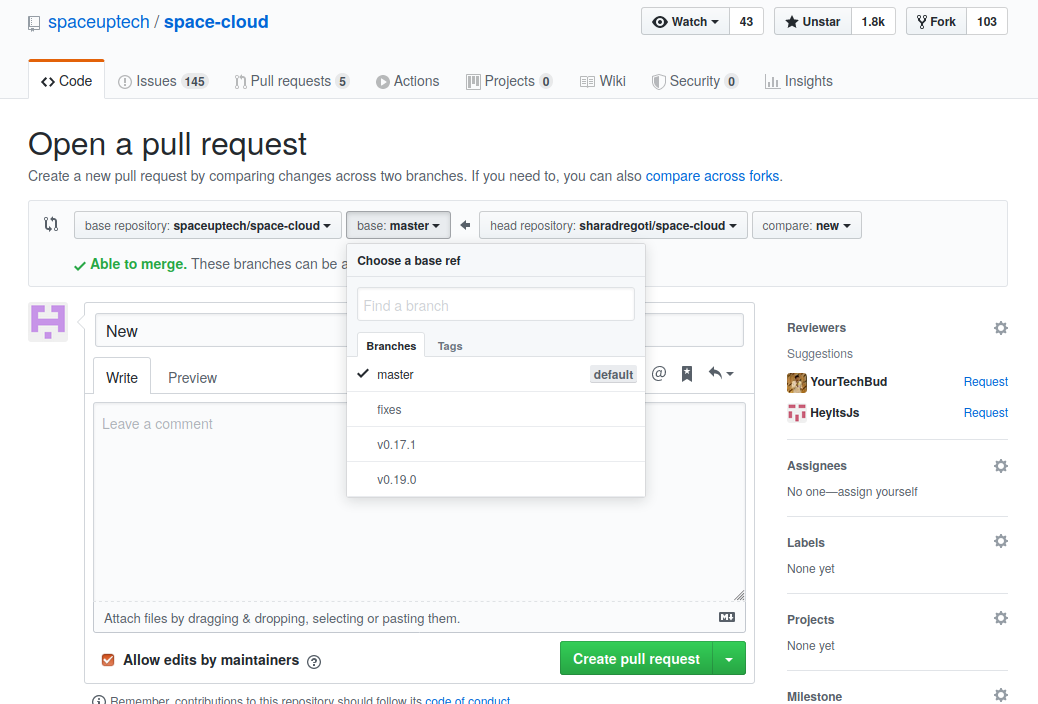
Congrats, you have successfully created a pull request.
Steps For Resolving Reviews In Pull Request
The review process may take some time. You might already have started with your new task. As your git is already setup, you just have to perform branching operations.
Let’s just say you have been assigned with a task to create a rest endpoint which takes 2 numbers in request and return their subtraction in the result. And this has to be done in version 19.
You will first pull the version branch(19 in this case) from upstream, make sure you have the latest changes in version branch. Create a feature branch out of it.
Great, now you have started working on your next task, and you have finished it half. But suddenly you have got some reviews from your previous task, there might be some bugs or some small fixes.
Whenever you get some reviews on a pull request, that should be a high priority. You have to solve that first. But you cant directly switch to your previous feature branch, as you already got some changes in your current branch.
1] Commit Your Existing Code With WIP Message
Note: WIP is an acronym for work in progress
git commit -m "WIP: your message"
2] Switch To Your Previous Feature Branch
Now you can switch to your previous feature branch, as the status of your current code has been saved. Use command.
git checkout < previous feature branch name >
After switching branches, you can start fixing your code as per the reviews. After completing the reviews, you can follow the steps to push the code to your origin repository.
If you have created pull request already you don’t have to create another one, Github automatically updates the existing pull request.
I know Github is awesome!
Once you have pushed your changes, you can switch to your current feature branch and continue working.
We have covered the most used commands while working on a project with a team. But there are some additional cases that we missed out.
These are the steps performed before pushing the code to your origin repository. Let’s take a look at them one by one
Dealing with Merge Conflicts
When you have completed coding the task assigned to you, you will push the code to remote so that it gets reviewed.
Now pushing your code may create conflicts. This happens because a teammates code got merged while you were working on your code. And that change conflicts with the change you are making.
To resolve the conflicts you just have to pull the latest version branch in your current feature branch. To get the latest changes of version branch use:
git pull upstream <version-branch-name>
The above operation will result in merge conflicts.
What are merge conflicts?
A merge conflict usually occurs when your current branch and the branch you want to merge into the current branch have diverged. That is, you have commits in your current branch which are not in the other branch, and vice versa.
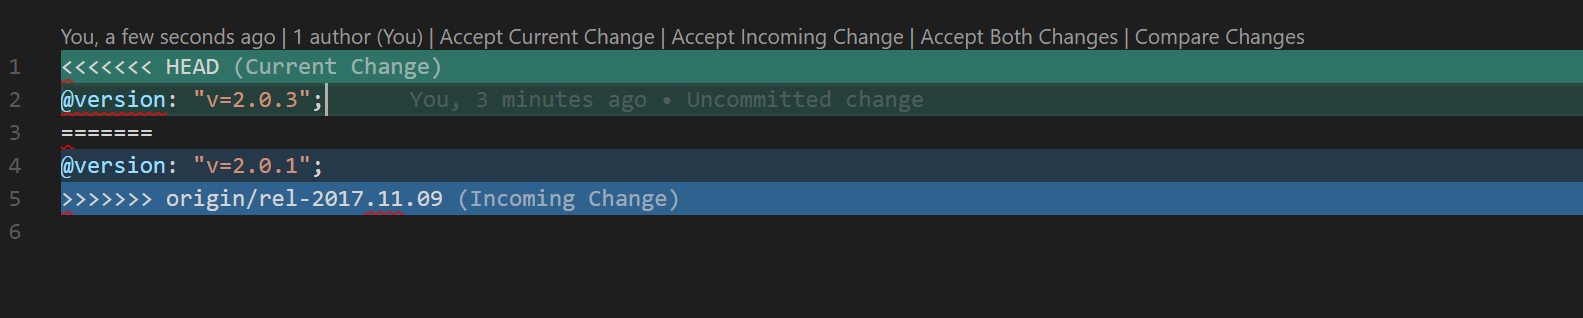
How to resolve merge conflicts?
There will be 3 cases:
- Accepting Incoming Changes
- Accepting Current Changes
- Combination of Both
Resolve the conflicts and push your code again. Github won’t allow your pull request to be merged till the conflicts are manually resolved.
The Deal with Continuous Integration (CI)
Continuous Integration (CI) is a development practise where developers integrate code into a shared repository frequently, preferably several times a day. Each integration can then be verified by an automated build and automated tests.
Before pushing the code to the origin you should run this builds, tests, linters locally to ensure that they don’t fail after creating a pull request. If any of the checks fail you have to repeat the process of pushing code to origin after fixing the checks which failed.
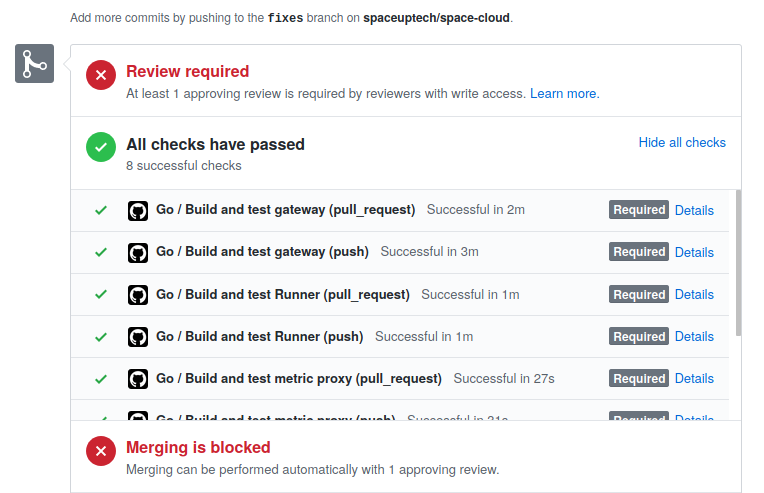
This ensures the code merged in upstream is working and bug-free.
Wrapping Up
In this post we have learned the essential git commands that you require working with the git daily like how to set up git locally & remotely, writing code on a branch created from version branch, creating a pull request for getting your code reviewed, resolving merged conflicts, handling continuous integration & much more.
If you enjoyed this post, I’d be very grateful if you’d help it spread by emailing it to a friend or sharing it on Twitter or Facebook. Thank you!